Paper garland can dress-up any party or wedding. It can be sewn, tasseled, made into shapes like triangles, circles, and butterflies. Or you can make it simple like flowing ribbon.
If you have days to work on it then that’s great! If not, we have a quick 20 minute DIY project to dress-up your next party brought to you by Boulder boudoir photographer, Imthiaz Houseman.
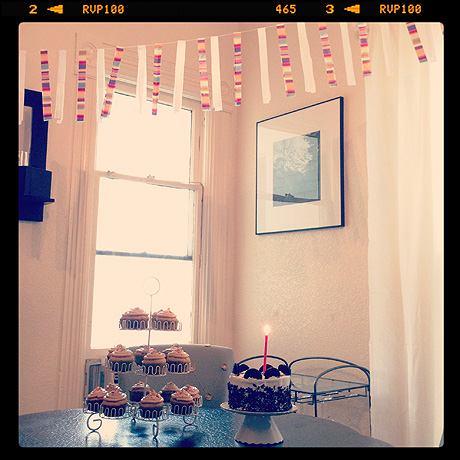
Recently, we hosted our daughters 8th birthday party. I realized halfway through the day I neglected to buy any type of decorations for the party! I know, I know… MAJOR over site!! After a failed 15 minute conversation on why we didn’t need birthday decorations I started searching the house to find something to make.
I’m sure you are asking why I didn’t run out and buy something that was quick and easy. Well, the answer is simple the party was under 3 hours away and I had cupcakes in the oven. I could have asked my amazing husband to run out, but he was already running around picking up the cake, pizza, etc.
So, here’s what I came up with and it was a hit! I choose to make my paper garland as one inch strands because I wanted the look of flowing ribbons when the wind blew through the house. This project can also be made into triangles using the same directions as below (cutting into triangles instead of one-inch strands) and done in about the same amount of time.

Supplies:
- Tissue paper, card stock or construction paper
- Thread or string (to hang)
- Sissors
- Craft glue
- Ruler (optional)
Directions:
- Gather materials.
- Open up tissue paper and fold in half. Take ruler and measure out one-inch strands of paper garland and cut. Continue until you have cut the entire half of tissue paper. Continue doing this with all colors of tissue paper you will be using for paper garland.
- Measure out enough string to glue paper garland strands to it. Unfold paper garland strand and put a small drop of craft glue near the crease. Put string on glue dot and fold paper garland back at the crease with the string near the top. Alternate each color of paper garland.
- Once your done gluing hang your beautiful garland and save for next time!
Happy Crafting! 🙂