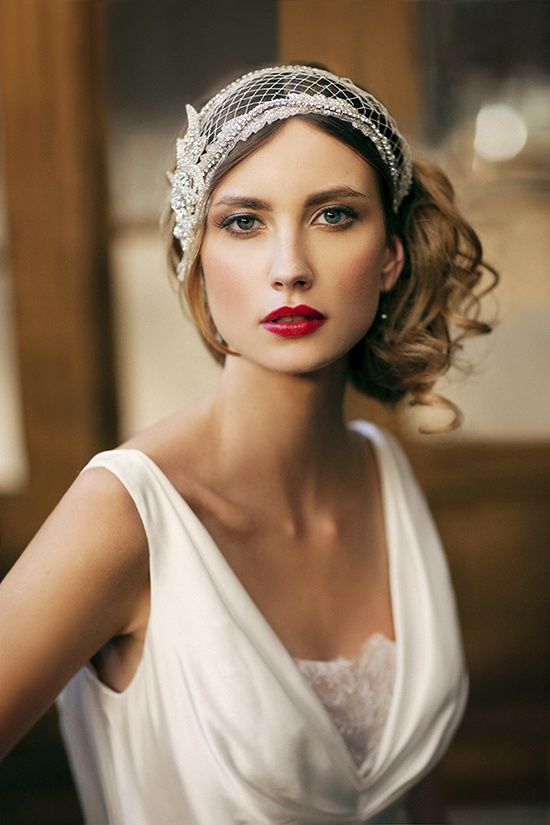
(Photo Source)
I love fascinators and headbands. I also love that you can do a simple updo and compliment it with a gorgeous headpiece. This easy tutorial is courtesy of The Beauty Department and will glam up any look or outfit!
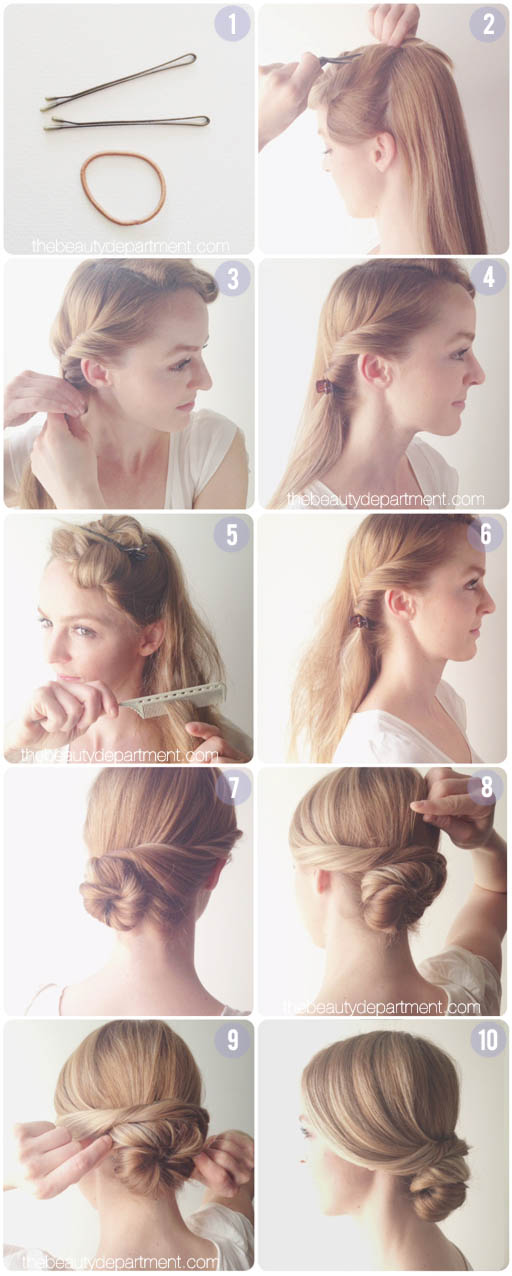
- You’ll need a couple of larger bobby pins and a thin rubberband.
- You’ll want a side part for this because the fascinator is going to sit on the side with less hair. Create a section from your ear up to the part as you see in photo 2. Clip all that hair out of the way and save it for the end.
- On the side with less hair, twist everything back and over your ear.
- Clip it in place using a claw clip.
- Lightly tease the rest of your hair. You want to do this so that the bun you’re about to make will be a little fuller. If you have super thick hair you’re welcome to skip this step.
- The hair shouldn’t be agressively teased. It should look like picture 6.
- Remove the clip and keep twisting in an upward motion. Twist it right into a bun shape and secure using the thin rubberband. Go ahead and insert one of the large bobby pins for security.
- Take the section you had clipped up out of the clip. Lightly twist that in an upward direction and wrap it around the bun. Secure it using your other large bobby pin. If you have thicker hair and you need more pins, go for it!
- Once everthing is secured, lightly pull at the bun if you want to make it a little bigger. If you like the size of it, you can skip this step.
- Spray all over using a firm holding hairspray.
Each fascinator is different. Some come with clips, some with headbands, some with combs, and some vintage ones come with nothing. Attach the fascinator on the side with less hair. The Beauty Department recommends attaching it just slightly below the part.