Yoga is a great way to stay healthy and stress-free. If you have not practiced yoga before this series is a great way to get your practice started. Yoga is also a great way to get in shape for your upcoming wedding and you try it out in the comfort of your home before go to a yoga class.
This series has some of the most common poses you will see at any Vinyasa-style yoga class and will teach you how to transition from one yoga pose to the next.
Child’s Pose

Child’s Pose is the perfect pose to reconnect with your breath and give your body a moment to recoup. If you feel overwhelmed during class or if your breath is shallow, drop to your knees, and hang out in Child’s Pose for a few deep breaths.
- Kneel on your mat with knees hips-width apart and big toes touching behind you. Take a deep breath in and as you exhale, lay your torso over your thighs. Try to lengthen your next and spine by drawing your ribs away from your tailbone and the crown of your head away from your shoulders.
- Rest your ams beside your legs, with palms facing up, or try extending your arms out in front of you.
- Stay here for five breaths.
Downward Facing Dog

After a little practice you will find it very easy to relax in Downward Facing Dog. Do your best to let your arms and legs equally share the weight of your body. It’s the best way to feel more stable and comfortable in Downward Facing Dog.
- From Child’s Pose, press back on your hands, and come into a tabletop position on your hands and knees. Your wrists should be underneath your shoulders, and your knees should be underneath your hips.
- Inhale as you tuck your toes under your heels. Exhale to life your hips, coming into an upside-down V shape called Downward Facing Dog.
- Spread your fingers wide, and create a straight line between your middle fingers and elbows. Work on straightening your legs and lowering your heels toward the ground. Relax your head between your arms, and direct your gaze through your legs or up toward your belly button. Hold for five breaths.
Standing Forward Bend
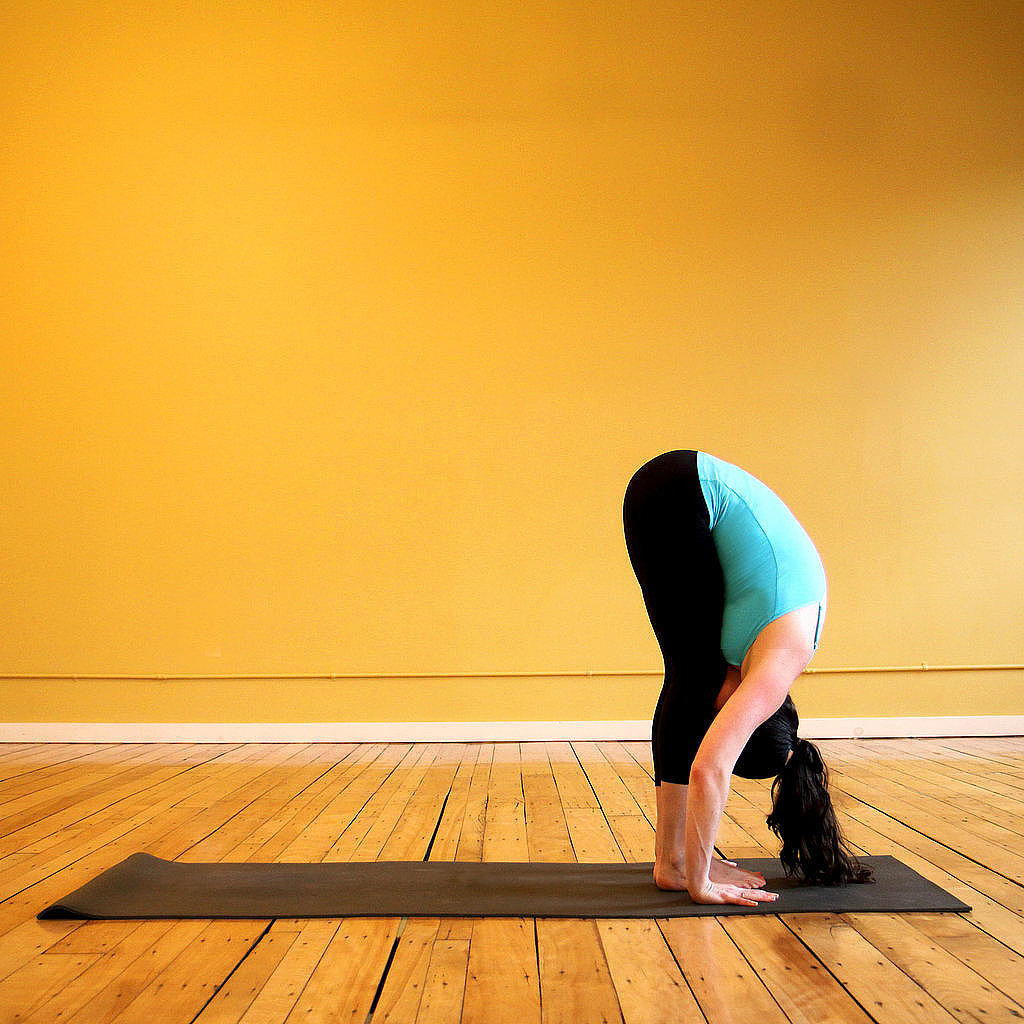
Standing Forward Bend is an amazing pose for a deep and intense stretch of your hamstrings and upper back. The full version of this pose calls for straight legs, but if it feels like to much, give a little bend to your knees to create more space.
- From Downward Facing Dog, keep your hands on the mat, and slowly step one foot at a time to the top of your mat so your feet meet your hands. Inhale with a flat back, and gaze slightly forward.
- As you exhale, engage your abs to fold forward with a straight back. Tuck your chin in toward your chest, relax your shoulders, and extend the crown of your head toward the floor to create a long spine. Shift your weight forward onto your toes, trying to straighten the legs as much as possible. If this feels uncomfortable, allow your knees to have a little bend so you can focus on releasing your back.
- Place your hands on the ground, fingertips lining up with your toes.
- Hold here for five breaths.
Upward Facing Dog

This chest-opeing pose requires ample arm strength to lift your hips up and away from your mat. If the stretch feels too intense from the start, don’t be afraid to start off in Cobra Pose, a gentler alternative that offers the same benefits to your upper body.
- From Standing Forward Bend, inhale and life your chest up with a flat back. Rest your hands on your shins or just below your knees to release your spine.
- As you exhale, place your hands on the mat, and step your feet back one at a time to the top of a push-up or plank position.
- As you exhale, slowly lower your body in a straight line down toward your mat. Inhale a breath as you scoop your chest forward, balancing on the tops of your feet and your hands, coming into Upward Facing Dog.
- Keep your hips lifted and off the ground, and do your best to press into the tops of your feet and palms simultaneously. If this feels comfortable, start to lift your chin, and lower your head back between your shoulder blades without losing the backbend feels. Pull your shoulder blades down your back, and hold for five breaths.
- When you’ve completed five breaths, drop your knees to the mat, and press your hips back to Downward Facing Dog.
Warrior 1
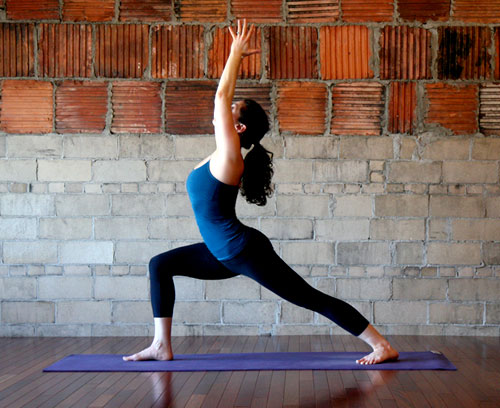
Warrior 1 opens up the hips while strengthening the lower body. The key to this pose is making sure your hips are square toward the front of the room.
- From Downward Facing Dog, step your right foot forward between your hands. Turn your heel in, press into your feet, and lift your torso up.
- Lift your arms up, and press your palms together. Draw your should blades down toward your hips, and gaze up at your hands.
- Stay here for five breaths. Then come back to Downward Facing Dog, and step your left foot forward to do Warrior 1 on the other side.
Warrior 2
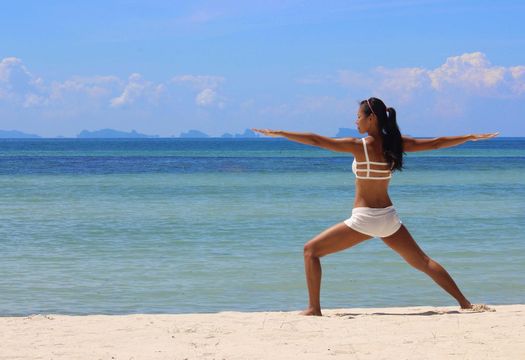
Warrior 2 is another quad-strengthing and hip-opening pose you will come to love. Remember to roll your shoulders back to loosen up your neck. If you feel the burn, that’s good!
- From Downward Facing Dog, step your right foot forward between your palms, and come back to Warrior 1.
- Extend your arms out into T position as you rotate your torso to the left, coming into Warrior 2. Ideally, your front thigh should be parallel to the ground and your right knee directly over your right ankle. Make sure your shoulders are stacked directly above your pelvis.
- Gaze past your right fingertips, holding for five breaths. Then place your hands on the mat, and step back one foot at a time to return to Downward Facing Dog. Step your left foot forward, and do this pose on the other side.
Open Triangle
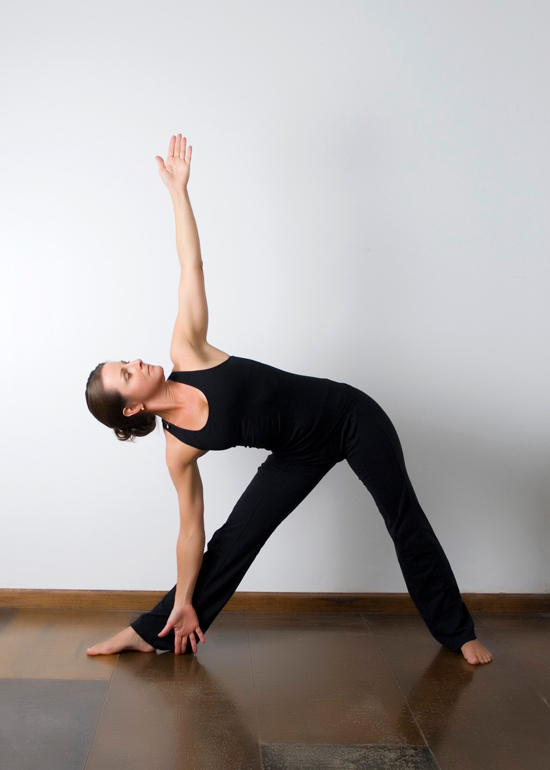
Following the instructions step by step for this pose is key. You will feel amazing once you master it!
- From Downward Facing Dog, step your left foot forward between your hands, and rise up into Warrior 1.
- Open your hips, arms, and chest into another Warrior 2.
- Straighten your left leg, and turn your right toes slightly to the left, making a 45-degree angle. Keep both legs straight as you reach your left hand straight out over your left leg. Lower your left hand, resting it on your left shin or a block, or place your palm flat on the floor. Extend your right arm straight up, and gaze at your fingertips.
- Stay like this for five deep breaths. Then turn your upper body toward the mat, drop your hands to the top of your mat, and step back to Downward Facing Dog before repeating this pose on the other side.
Boat Pose
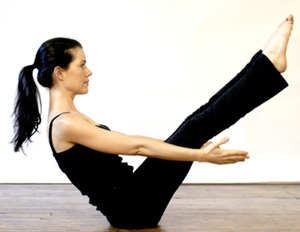
This is a core-strenghting pose. If your body starts to shake, it’s a good thing because your core is engaged and working! In the meantime don’t be afraid to give your legs a little rest and bend them at the knee. After time you will be able to keep your legs extended.
- Once you’ve stepped back into Downward Facing Dog gently lower your knees to the mat, and come to sit on your bottom. Bend your knees, and lift your feet off the floor, balancing on your tush.
- Keep the spine long, and straighten your legs as much as you can without rounding your back. If this is too hard, keep your knees bent- you’re still working your core.
Half Wheel
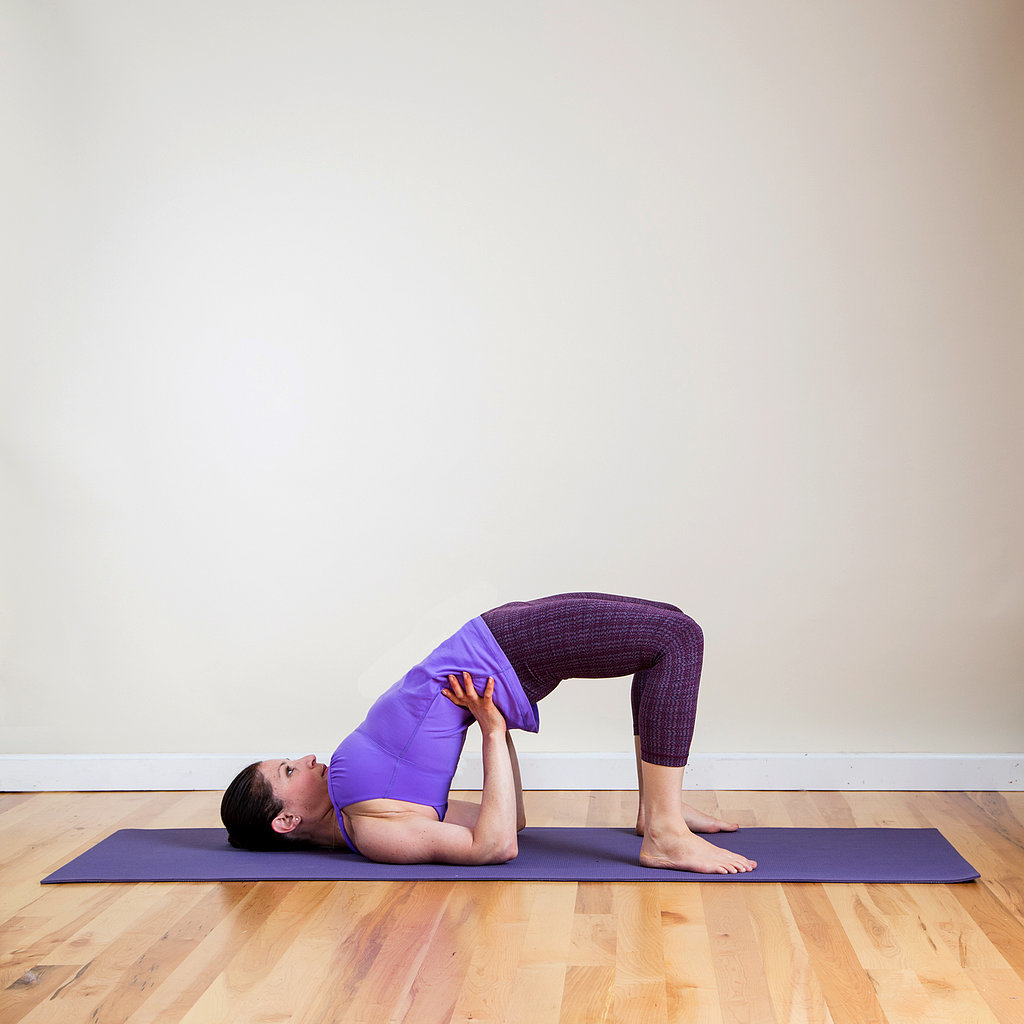
Half Wheel Pose is a calming pose for the whole body. Make sure before you start this pose you have a flat solid foundation.
- After Boat Pose, come to lie on your back.
- Bend your knees, and place your feet flat on the floor. Walk your heels as close as you can to your bottom, and turn your heels out slightly so the outside edges of your feet are parallel with the outside edges of your mat.
- Lift your hips up, and place your hands on either side of your lower back. Rock your weight from side to side, so you can pull your shoulder blades closer together.
- Stay here for five deep breaths, actively pressing your feet into the floor to lift your hips up and increase the stretch in your torso and neck.
- Gently lower your bum back to the ground, and hug your knees into your chest.
- Work your way back to Down Dog, and repeat this sequence on your left side before coming into Savasana.
Savasana
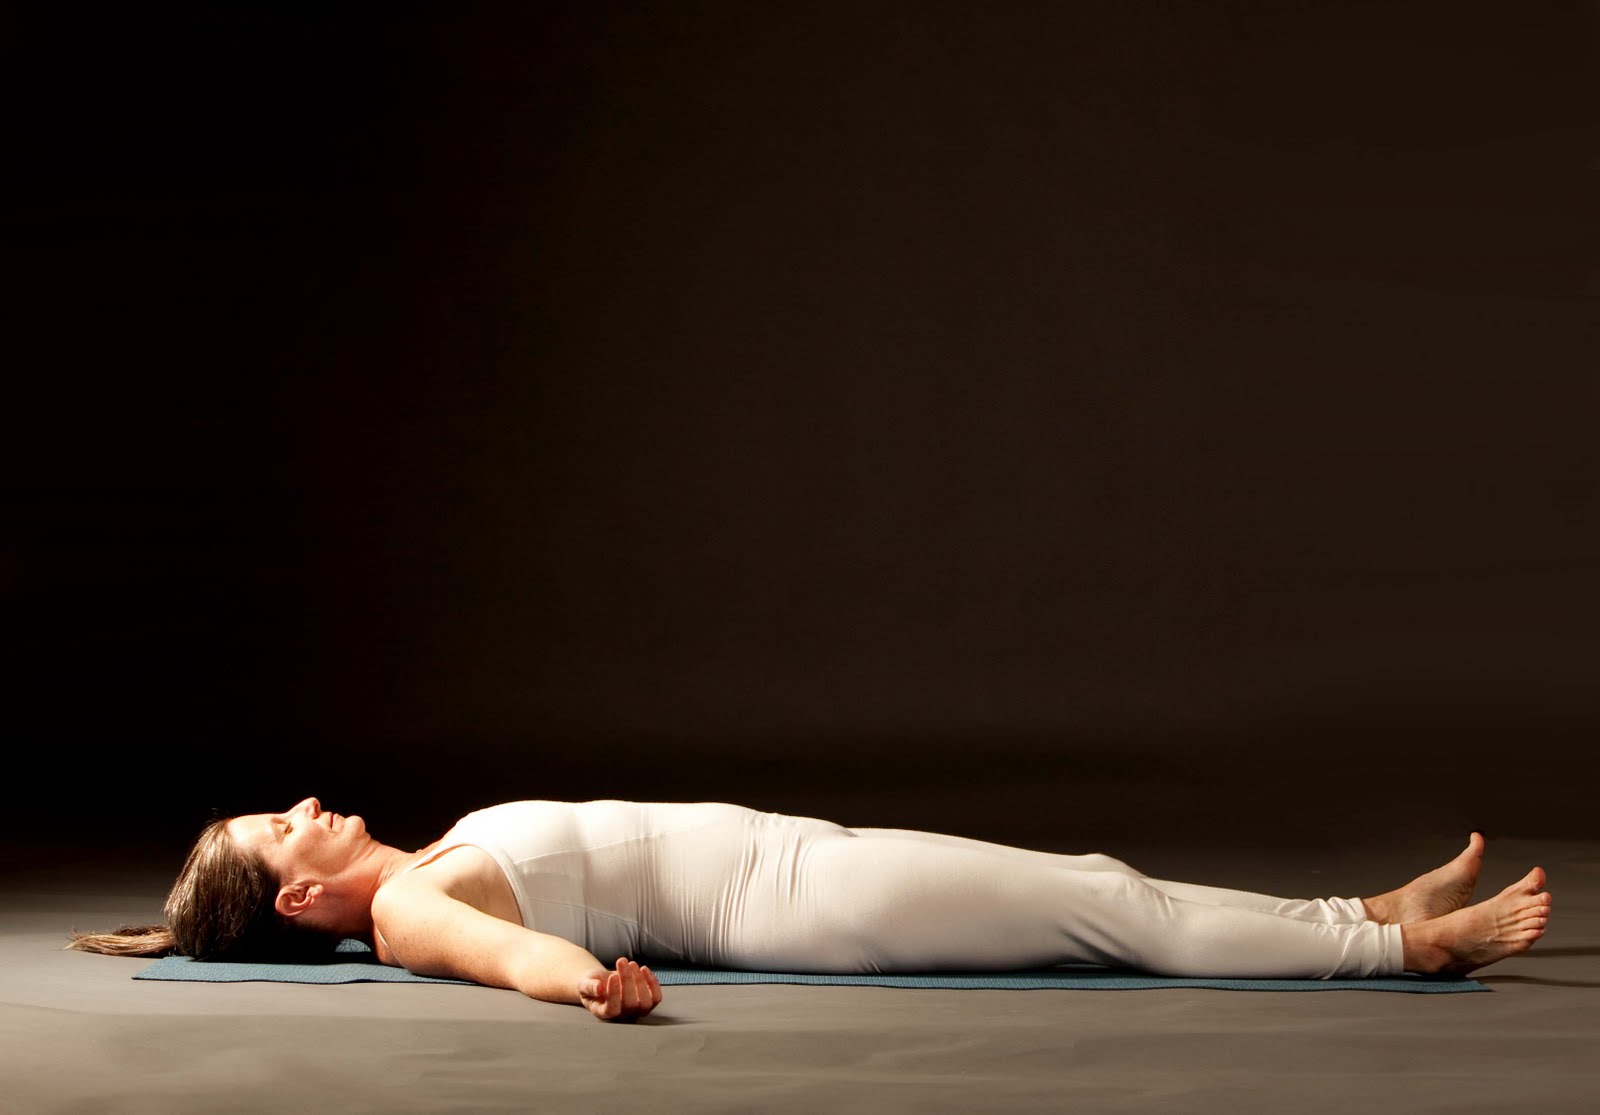
Savasana (or Corpse) Pose is the ending to almost any yoga class. Relax and celebrate getting through your first yoga practice!
- After Bridge Pose, lie on your back, and close your eyes. In order to relax and open your body fully, extend your arms a few inches away from the body, with your palms facing up.
- Bring about 15 to 20 inches between your feet, allowing your feet to fall open with your toes pointing out. Actively shrug your shoulders and shoulder blades down toward your hips. Lengthen through your spine as much as possible, and try to press the small of your back into the floor.
- After you’ve found a comfortable position, enjoy the stillness for five to 10 minutes.
Namaste.
Photos courtesy of www.dietsinreview.com, www.lesserevillife.com, www.popsugar.com,www.lovemyyoga.com, www.popsugar.com, www.yogatrail.com, www.yogaward.com, www.dietsinreview.com, www.popsugar.com, and www.justbreathesoul.com.