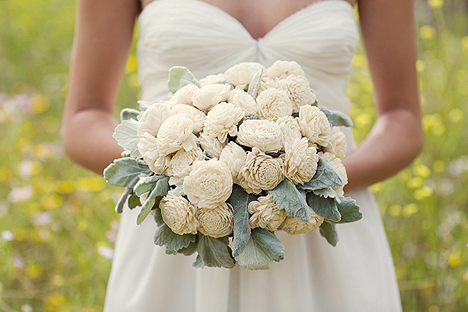
Balsa wood rose bouquets are unique and last forever and I can’t help but love these flowers. They are hard to find, so if your local florist doesn’t have them then you can make them yourself. Make sure you plan plenty of time before the wedding to attempt making your bouquet because if you have a mishap you have plenty of time to fix it. You also want to make sure you use extreme caution when making a balsa wood flower bouquet so you don’t hurt yourself in the process.
If you aren’t very crafty don’t worry you can find bouquets already made on etsy.com! Balsa wood rose bouquets are a great alternative if you are looking for flowers that will last forever, if you are allergic to real flowers, or if you are looking for the perfect DIY project. If you are looking for a darker color for fall you should check out how to make red balsa wood rose bouquets!
Materials Needed:
- Thin balsa wood (1/32 inch thick or less)
- Real or synthetic rose
- Pencil
- Artist’s blade or utility knife
- Wood glue
- Masking tape
- Grated cooling rack
- Clothes steamer or cooking pot with lid
- Wood dowel (l/4 inch diameter)
Directions:
- Use the petals from your real or synthetic rose to sketch your petals onto the balsa wood. Draw the petals onto the wood and make them slightly larger than the actual petal. This will allow for greater wood flexibility and easier handling. Cut out the petal shapes with your artist’s blade. Your finished flower will only need around 10 or so balsa petals since the wood is thicker than a real flower petal. Using balsa pieces no thicker than 1/32 inch will allow for the best flexibility and the most realistic representation.
- Cut out the balsa wood petals with your artist’s blade and place onto the grated cooling rack. Use your clothing steamer to soften one piece at a time, holding it near the piece for a couple of minutes on both sides. Test the flexibility of the piece and continue to steam if necessary. If you don’t have a clothing steamer then you can place the grated cooling rack over a pot of gently boiling water, place the pot’s lid over the wood pieces and rest it on the rack. {If painting your balsa roses add the base color onto your petals individually before assembling them. Finish by painting on the flower’s details after it’s been assembled}
- Curl the piece carefully into as tight a cone as possible once it is flexible enough. Make the outer edge of the petal the widest part of the cone. Tape the coned petal with your masking tape, wrapping it around the wood a couple of times. Repeat the process for all of your petals and let them dry for about an hour.
- Remove the tape from your dried petals. Place the glue near the base of the petals and attach to the dowel by sliding them inside each other. Start with the smallest inner-most petal by gluing this to the end of your 1/4 inch thick dowel stem and work your way out. Allow each newly added petal to dry before adding the next one. Cut out small rounded triangular pieces for the outer base of the flower and any leaves you may want to add to the stem, repeating the steaming process if necessary.
You can find more instructions and tips by visiting the eHow instructions for balsa wood roses.
Photo courtesy of www.unitedwithlove.com.